Creating a one-sided transparent effect in Adobe After Effects is a simple yet powerful technique that can add a professional touch to your designs. Follow this easy step-by-step guide to achieve the effect.
Step 1: Select Your Image or Vector
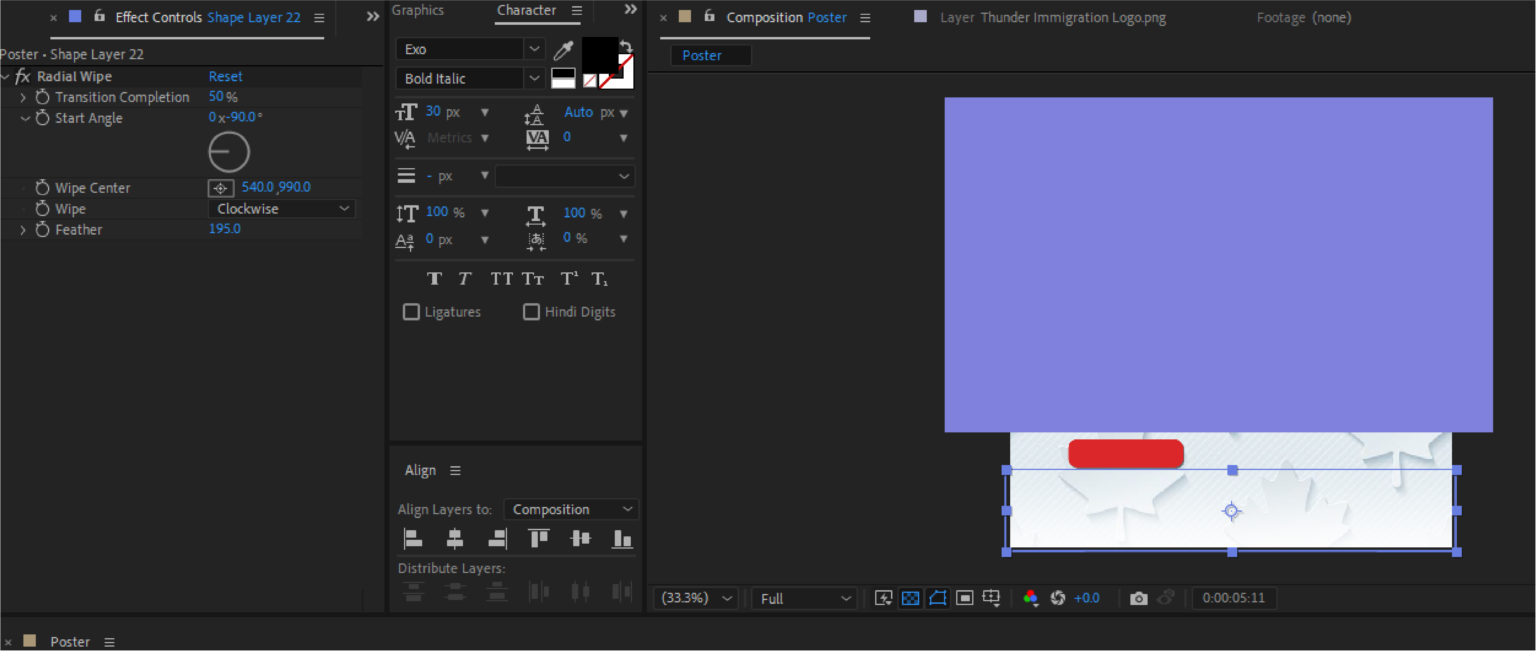
First, import the image or vector file that you want to apply the one-sided transparency effect to. Drag it onto your composition timeline.
Step 2: Apply the Radial Wipe Effect
- Go to the Effects & Presets panel.
- Search for Radial Wipe and apply it to your image or vector.
Step 3: Adjust Effect Controls
Now, modify the settings in the Effect Controls panel to create the transparency effect.
- Transition Completion: Set this to 50% to make half of the image transparent.
- Start Angle: Adjust to 0x -90 (Modify the -90 value if you want another side to be transparent).
- Wipe Center: Set to 540.0, 990.0 (Adjust as per your composition size).
- Wipe Clockwise: Enable this option.
- Feather: Set to 195 (Increase or decrease as per your preference to smooth the transition).
Step 4: Preview and Adjust
- Play your composition to see the effect.
- If needed, tweak the feather or start angle to fine-tune the transparency.
Final Thoughts
This technique is useful for creating smooth transparent effects on images and vectors, enhancing your designs in motion graphics projects.
Try it out and make your visuals stand out with this simple Radial Wipe Transparency Effect in Adobe After Effects!
Do you have any other After Effects techniques you’d like to learn? Let us know in the comments!