
DeepSeek ਅਤੇ ChatGPT – ਕਿਸ ਤਰ੍ਹਾਂ ਤੁਲਨਾ ਕਰਦੇ ਹਨ?
DeepSeek ਅਤੇ ChatGPT – ਕਿਸ ਤਰ੍ਹਾਂ ਤੁਲਨਾ ਕਰਦੇ ਹਨ?
ਚੀਨੀ AI ਐਪ DeepSeek ਦੇ ਆਉਣ ਨਾਲ ਨਾ ਸਿਰਫ ਵਿੱਤੀ ਮਾਰਕਿਟ ਹਿਲ ਗਈ ਹੈ, ਬਲਕਿ ਇਸ ਨੇ ਅਮਰੀਕੀ AI ਇੰਡਸਟਰੀ ਵਿੱਚ ਇੱਕ ਸਹਿਮ ਦੀ ਲਹਿਰ ਪੈਦਾ ਕਰ ਦਿੱਤੀ ਹੈ। ਪੂਰਵ ਅਮਰੀਕੀ ਰਾਸ਼ਟਰਪਤੀ ਡੋਨਾਲਡ ਟਰੰਪ ਨੇ ਇਸਨੂੰ “ਅਮਰੀਕੀ ਤਕਨਾਲੋਜੀ ਲਈ ਜਾਗਰੂਕਤਾ ਦਾ ਸੰਦੇਸ਼” ਕਿਹਾ ਹੈ।
DeepSeek ਦਾ ਦਾਅਵਾ ਹੈ ਕਿ ਉਸਦੇ R1 AI ਮਾਡਲ ਨੂੰ ਸਪੱਸ਼ਟ ਰੂਪ ਵਿੱਚ ਕਈ ਗੁਣਾ ਘੱਟ ਖਰਚ ‘ਤੇ ਤਿਆਰ ਕੀਤਾ ਗਿਆ ਹੈ। ਇਸ ਦਾਅਵੇ ਨੇ ਪੂਰੀ ਇੰਡਸਟਰੀ ਨੂੰ ਨਵੀਂ ਸੋਚ ਲਈ ਮਜਬੂਰ ਕੀਤਾ ਹੈ।
ਇਸੇ ਨਾਲ, DeepSeek ਸ਼ੁਰੂਆਤੀ ਹਫ਼ਤੇ ਵਿੱਚ ਹੀ ਅਮਰੀਕਾ ਵਿੱਚ ਸਭ ਤੋਂ ਜਿਆਦਾ ਡਾਊਨਲੋਡ ਕੀਤੀ ਗਈ ਮੁਫ਼ਤ ਐਪ ਬਣ ਗਈ।
DeepSeek ਅਤੇ ChatGPT ਦੀ ਕਾਰਗੁਜ਼ਾਰੀ ‘ਤੇ ਤੁਲਨਾ
ChatGPT ਵਰਤਣ ਵਾਲਿਆਂ ਦੇ ਮੁੱਖ ਕਾਰਨਾਂ ਵਿੱਚ ਰਚਨਾਤਮਕ ਲਿਖਤਾਂ ਲਈ ਮਦਦ ਮੁਖ ਸਥਾਨ ‘ਤੇ ਹੈ। ਜਿਵੇਂ ਬਲਾਗ ਪੋਸਟਾਂ ਲਿਖਣ ਤੋਂ ਲੈ ਕੇ ਜਾਣਕਾਰੀ ਨੂੰ ਸੰਖੇਪ ਵਿੱਚ ਪੇਸ਼ ਕਰਨਾ।
ਇੱਕ ਸ਼ੌਕ਼ੀਨ ਸਕਾਟਿਸ਼ ਫੁਟਬਾਲ ਪ੍ਰੇਮੀ ਵਜੋਂ, ਜਦ ਮੈਂ ਸਕਾਟਿਸ਼ ਫੁਟਬਾਲ ਦੇ ਸਭ ਤੋਂ ਮਹਾਨ ਖਿਡਾਰੀਆਂ ਦੀ ਲਿਸਟ ਦੇ ਬਾਰੇ ਦੋਵੇਂ ਬੋਟਾਂ ਨੂੰ ਸਵਾਲ ਕੀਤਾ, ਤਾਂ ਦੋਵਾਂ ਦੇ ਜਵਾਬ ਚੌਕਾਣੇ ਵਾਲੇ ਸਨ।
- DeepSeek ਨੇ ਕਈ ਦੂਜੇ ਖਿਡਾਰੀਆਂ ਦੇ ਵੇਰਵੇ ਸਮੇਤ ਇੱਕ ਸ਼ਾਨਦਾਰ ਲਿਸਟ ਦਿੱਤੀ। ਇਸ ਵਿੱਚ ਦੋ ਗੈਰ-ਸਕਾਟਿਸ਼ ਖਿਡਾਰੀ ਵੀ ਸ਼ਾਮਲ ਸਨ, ਜਿਵੇਂ ਕਿ ਸੈਲਟਿਕ ਹੀਰੋ ਹੈਂਰਿਕ ਲਾਰਸਨ।
- ChatGPT ਨੇ ਵੀ ਇਨ੍ਹਾਂ ਨਾਮਾਂ ਦੀ ਪੂਰੀ ਜਾਣਕਾਰੀ ਦੇ ਨਾਲ ਇੱਕ ਸੰਖੇਪ ਬਲਾਗ ਪੋਸਟ ਤਿਆਰ ਕੀਤੀ।
ਕੋਡਿੰਗ ‘ਚ ਯੋਗਦਾਨ
ਸਮਾਰਟ Coding ਲਈ, DeepSeek R1 ਨੂੰ ਬਹੁਤ ਪ੍ਰਭਾਵਸ਼ਾਲੀ ਮੰਨਿਆ ਗਿਆ। ਕੋਰੀਆ ਦੇ ਜੈਵੀਅਰ ਅਗੀਰੇ ਨੇ ਆਪਣੀ ਲਿੰਕਡਿਨ ਪੋਸਟ ਵਿੱਚ ਕਿਹਾ ਕਿ DeepSeek ਨੇ ਉਹ ਮੁਸ਼ਕਿਲ ਮਸਲਾ ਵੀ ਅਸਾਨੀ ਨਾਲ ਸੁਲਝਾ ਲਿਆ, ਜਿੱਥੇ ChatGPT ਫੇਲ੍ਹ ਹੋ ਗਿਆ ਸੀ।
ਉਸਨੇ ਕਿਹਾ, “ਕੋਡਿੰਗ ਲਈ ਕਈ ਵਾਰ ਦੋ ਮਾਡਲਾਂ ਦੀ ਮਿਲੀਭੁਗਤ ਨਾਲ ਕੰਮ ਕਰਨਾ ਸਭ ਤੋਂ ਚੰਗਾ ਹੱਲ ਹੈ।”
ਕਹਾਣੀਆਂ ਅਤੇ ਰਚਨਾਤਮਕ ਆਈਡੀਆ
ਜਦ ਮੈਂ ਦੋਵੇਂ ਮਾਡਲਾਂ ਨੂੰ “ਚੰਦਰਮਾ ‘ਤੇ ਰਹਿਣ ਵਾਲੇ ਲੜਕੇ ਦੀ ਕਹਾਣੀ” ਬਾਰੇ ਆਈਡੀਆ ਦੇਣ ਨੂੰ ਕਿਹਾ:
- ChatGPT ਨੇ ਛੇ ਆਈਡੀਆ ਦਿਤੇ।
- DeepSeek ਨੇ ਇੱਕ ਪੂਰੀ ਕਹਾਣੀ “Luna and the Boy Who Chased the Stars” ਪੇਸ਼ ਕੀਤੀ।
ਨਵੀਂ ਤਕਨਾਲੋਜੀ ਦਾ ਭਵਿੱਖ
DeepSeek ਦੀ ਆਉਣ ਵਾਲੀ ਰਸਤਾ ਸਿਰਫ ਸ਼ੁਰੂਆਤ ਹੈ। ਜਿਵੇਂ ਕਿ ਕੇਮਬ੍ਰਿਜ ਯੂਨੀਵਰਸਿਟੀ ਦੇ ਪ੍ਰੋਫੈਸਰ ਨੀਲ ਲਾਰੈਂਸ ਕਹਿੰਦੇ ਹਨ, “ਇਹ ਤਕਨਾਲੋਜੀ ਵਿੱਚ ਨਵੇਂ ਅਵਿਸ਼ਕਾਰਾਂ ਦਾ ਕੇਵਲ ਅਰੰਭ ਹੈ।”
DeepSeek ਅਤੇ ChatGPT ਦੋਵੇਂ ਅਗਲੀ ਪੀੜ੍ਹੀ ਦੇ ਚਮਤਕਾਰੀ ਉਪਕਰਣ ਹਨ। ਕੋਈ ਵੀ ਹਾਰੀ ਨਹੀਂ, ਪਰ ਮੋਟਰ ਬੋਟ ਦੀ ਦੌੜ ਹੁਣ ਹੋਰ ਰੋਮਾਂਚਕ ਹੋਵੇਗੀ।
DeepSeek vs ChatGPT, AI ਮਾਡਲ ਤੁਲਨਾ, DeepSeek ਫੀਚਰ, ChatGPT ਬਲਾਗ, ਕੋਡਿੰਗ ਲਈ DeepSeek
DeepSeek vs ChatGPT: How Do They Compare?
The Chinese AI app DeepSeek has taken the tech world by storm, shaking financial markets and catching the attention of global leaders. Former US President Donald Trump called it “a wake-up call” for the US tech industry.
DeepSeek’s claim to have developed its R1 AI model at a fraction of the cost of competitors has raised questions about the future of AI. Within just a week of its launch, it became the most downloaded free app in the US, drawing comparisons to established US rivals like OpenAI’s ChatGPT and Google’s Gemini.
Writing and Creativity
One of ChatGPT’s most popular uses is helping people write, whether it’s gathering information, summarizing topics, or drafting blog posts. Both DeepSeek and ChatGPT performed well when tasked with summarizing the best Scottish football players of all time.
- DeepSeek: Quickly provided a top-10 list, noting players’ positions, clubs, and achievements. It also mentioned two non-Scottish players, explaining their inclusion in the context of Scottish football.
- ChatGPT: Produced a similar list with accurate details, concluding with a thoughtful reflection on the legacy of these players.
For writing tasks, both tools showed impressive results, with DeepSeek focusing on concise, informative responses, while ChatGPT added a polished touch.
Coding Assistance
AI tools have become invaluable to developers, and DeepSeek is proving to be a strong contender in this space. Javier Aguirre, an AI researcher, praised DeepSeek for solving a complex coding problem that even ChatGPT struggled with. Developers also recommend combining DeepSeek with other AI models, like Anthropic’s Claude Sonnet, for optimal results.
Notably, DeepSeek is much cheaper to use compared to its US rivals, making it an attractive option for budget-conscious users.
Story Ideas
When asked for ideas for a children’s story about a boy who lives on the moon:
- ChatGPT: Offered six creative story ideas, each neatly summarized and open to further development.
- DeepSeek: Provided a single detailed story idea about a boy named Milo on an adventure, though it lacked depth and originality.
While ChatGPT excelled at brainstorming multiple concepts, DeepSeek’s ability to quickly deliver a complete story shows its potential in storytelling tasks.
Learning and Research
Explaining complex topics like the causes of World War I, both chatbots delivered strong results:
- ChatGPT: Provided a detailed explanation, outlining key factors and events.
- DeepSeek: Gave a concise summary that covered the main points, though less detailed than ChatGPT.
- Google’s Gemini: Added a unique feature by including links to reputable sources for further reading.
A Competitive AI Race
DeepSeek has shown that Chinese tech innovation can rival US companies, challenging industry leaders despite their massive investments. Experts believe this is just the beginning of a wave of innovations that will reshape the AI landscape.
As Professor Neil Lawrence from Cambridge University pointed out, this is an opportunity for new players to emerge and improve on existing technologies, much like James Watt improved the steam engine. The AI race is far from over, and the competition is only heating up.
How to Make One Side Transparent in an Image or Vector – Adobe After Effects Tutorial
Creating a one-sided transparent effect in Adobe After Effects is a simple yet powerful technique that can add a professional touch to your designs. Follow this easy step-by-step guide to achieve the effect.
Step 1: Select Your Image or Vector
First, import the image or vector file that you want to apply the one-sided transparency effect to. Drag it onto your composition timeline.
Step 2: Apply the Radial Wipe Effect
- Go to the Effects & Presets panel.
- Search for Radial Wipe and apply it to your image or vector.
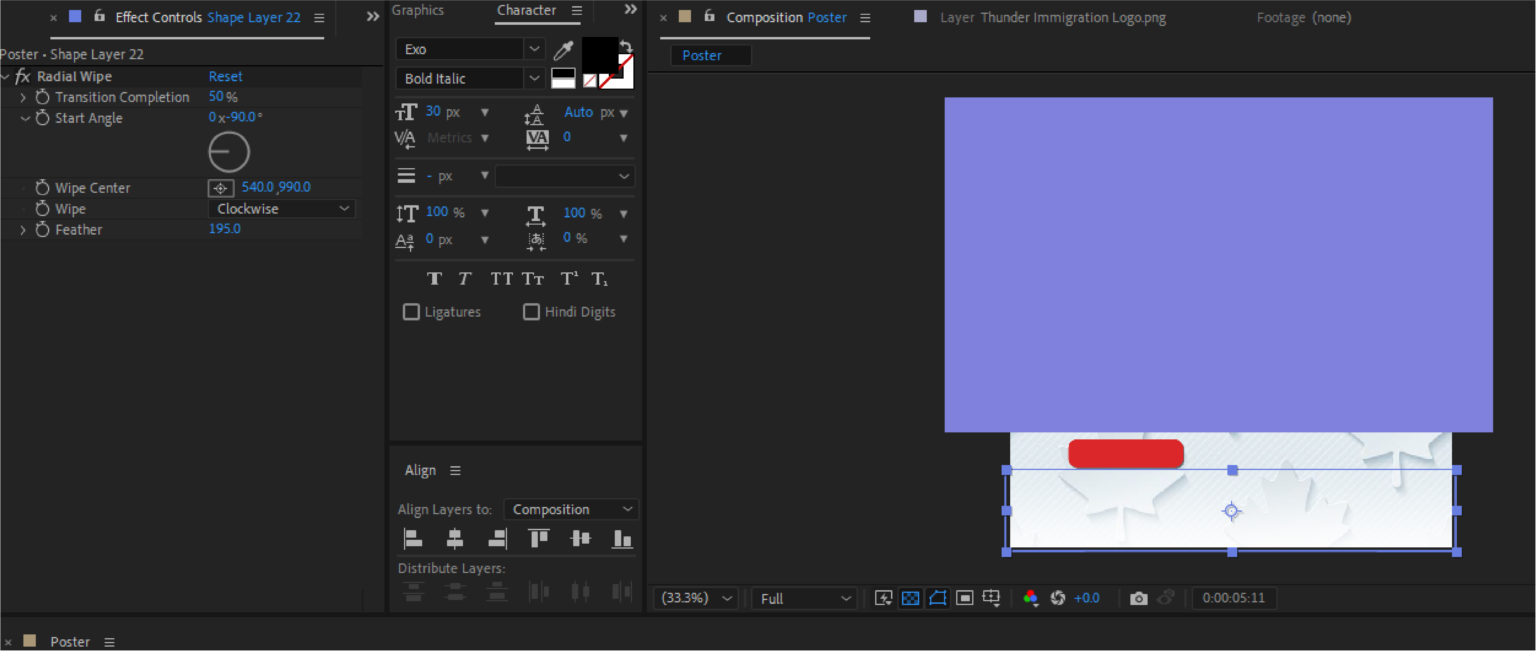
Step 3: Adjust Effect Controls
Now, modify the settings in the Effect Controls panel to create the transparency effect.
- Transition Completion: Set this to 50% to make half of the image transparent.
- Start Angle: Adjust to 0x -90 (Modify the -90 value if you want another side to be transparent).
- Wipe Center: Set to 540.0, 990.0 (Adjust as per your composition size).
- Wipe Clockwise: Enable this option.
- Feather: Set to 195 (Increase or decrease as per your preference to smooth the transition).
Step 4: Preview and Adjust
- Play your composition to see the effect.
- If needed, tweak the feather or start angle to fine-tune the transparency.
Final Thoughts
This technique is useful for creating smooth transparent effects on images and vectors, enhancing your designs in motion graphics projects.
Try it out and make your visuals stand out with this simple Radial Wipe Transparency Effect in Adobe After Effects!
Do you have any other After Effects techniques you’d like to learn? Let us know in the comments!
Fix: Other Logged Google Accounts Not Showing When Switching in YouTube or YouTube Studio
Title: Solved: YouTube Studio Account Switching Issue – A Must-Know Fix
If you’ve ever faced the frustrating issue where your second YouTube channel doesn’t show up in YouTube Studio when switching accounts, you’re not alone. I searched everywhere – YouTube tutorials, AI tools, Google, forums – but none of the solutions worked. Finally, I figured it out, and I want to share this fix with you!
The Problem
When you switch accounts in YouTube or YouTube Studio, the second account doesn’t appear, or you get redirected to the Google My Account page. Even though the account is logged in, it seems inaccessible in YouTube Studio.
The Solution
The issue happens because you didn’t log in to the second account using the actual password. Many of us use other authentication methods like:
- OTP (One-Time Password)
- Fingerprint
- “Tap Yes” on Mobile
- Other Password-Skipping Tools
While these methods make logging in quicker, they don’t always give full access to certain services like YouTube Studio.
How to Fix It
- Log out of your second account completely.
- Log back in using the password for the account.
- Avoid bypassing the login with OTP, fingerprint, or mobile prompts.
- Once logged in, go to YouTube Studio and switch accounts. The second account will now appear, and you can access it without any issues.
Why Does This Happen?
When you log in using alternative methods, Google doesn’t fully authenticate your account for all services. Some services like YouTube Studio require password-based authentication for access.
Conclusion
If you’re facing this issue, make sure to always log in with the account password. This simple fix saved me a lot of time and frustration, and I hope it helps you too!
Let me know in the comments if this solved your problem or if you have any questions!
- “Why is my second Google account not showing in YouTube Studio?”
- “Unable to switch accounts in YouTube Studio – Second account missing”
- “Other Google account not appearing in YouTube switch account menu”
- “How to fix YouTube Studio account switch issue?”
- “YouTube Studio second account not showing up – What to do?”
- “Why can’t I see my other Google account in YouTube Studio?”
- “Fix for missing account when switching in YouTube or Studio”
- “Logged-in Google account not visible in YouTube account switcher”
- “Can’t switch to my second YouTube account in YouTube Studio”
- “How to solve account switching problem in YouTube and YouTube Studio?”
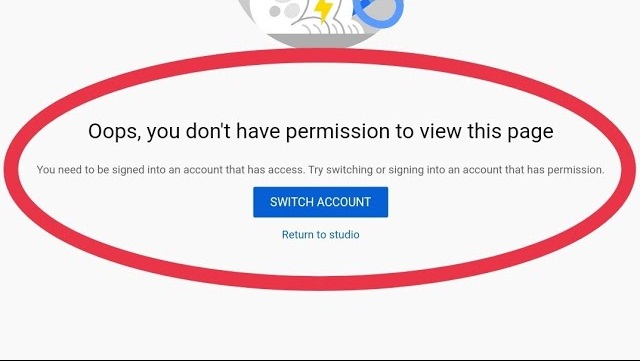
- “Why do I see ‘Oops, you don’t have permission to view this page’ when switching YouTube accounts?”
- “Fix: ‘Oops, you don’t have permission to view this page’ error in YouTube Studio”
- “Why can’t I access my second YouTube account? ‘Oops, you don’t have permission’ error”
- “How to fix YouTube Studio switch account error: ‘Oops, you don’t have permission to view this page'”
- “Second YouTube account missing and showing ‘Oops, you don’t have permission’ error”
- “Why am I getting ‘Oops, you don’t have permission to view this page’ in YouTube Studio?”
- “Switching YouTube accounts leads to ‘Oops, you don’t have permission’ – How to fix?”
- “YouTube Studio: ‘Oops, you don’t have permission to view this page’ when switching accounts”
- “How to fix the YouTube account switch issue with ‘Oops, you don’t have permission’ error?”
- “Why does YouTube Studio show ‘Oops, you don’t have permission’ after switching accounts?”
How to Make Website?
How to Make a Website (Paid Version)
Creating a professional website requires a few essential components, especially if you’re opting for a paid version. Below, we break down the four key elements you need to get started:
1. Hosting (Server)
Hosting is where your website lives on the internet. It’s essentially the storage space for your website’s files, databases, and other necessary elements. Choosing a reliable hosting provider is crucial for ensuring that your website is fast, secure, and always accessible.
Example:
You can purchase hosting packages from companies like Hostinger, which offers various plans depending on your needs. With Hostinger, you get fast servers, excellent customer support, and a range of features to help you manage your website efficiently.
2. Domain Name
Your domain name is your website’s address on the internet. It’s how users will find your site. Picking a domain name that’s memorable and relevant to your brand is essential.
Example:
A domain like www.yourwebsite.com is easy to remember and aligns with your brand identity. You can register a domain name through various registrars, and often, hosting companies like Hostinger offer domain registration as part of their hosting packages.
3. SSL Certificate (Optional)
An SSL certificate encrypts the data transmitted between your website and its visitors, adding a layer of security. It’s especially important for websites that handle sensitive information, such as e-commerce sites. While optional, an SSL certificate is recommended to build trust with your visitors and improve your website’s SEO.
Example:
Hostinger provides SSL certificates with its hosting plans. Having an SSL certificate enables the HTTPS protocol for your site, which not only secures your site but also boosts your search engine rankings.
4. Example Hosting Plan from Hostinger
Hostinger offers affordable and reliable hosting plans suitable for various types of websites, from personal blogs to business sites. Here’s what you get with Hostinger’s hosting plans:
- Fast Load Times: Quick server response ensures your website loads fast.
- Free Domain Name: Some plans include a free domain for the first year.
- 24/7 Support: Hostinger’s support team is available to help you around the clock.
- SSL Certificate: Included with most hosting plans for enhanced security.
Why Choose Hostinger?
Hostinger provides an excellent balance of affordability, performance, and customer support. Their hosting plans are user-friendly, making them ideal for both beginners and experienced users.
By following these steps and using a reliable hosting provider like Hostinger, you can set up a professional and secure website in no time. Whether you’re starting a blog, an online store, or a business site, these components are essential to getting your website up and running.
How to Fix YouTube Videos Not Playing with a Specific Google Account
- How do I fix YouTube videos not playing with a specific Google account?
- Why are YouTube videos not playing on my Google account?
- How do I clear account-level history in Google?
- How do I delete Chrome history to fix YouTube issues?
- Why is YouTube not working on one Google account but working on another?
- How do I resolve YouTube video playback issues on Chrome?
- What should I do if YouTube videos won’t load with my Google account?
- How do I check and fix the date and time on my PC for YouTube?
- Why is YouTube showing playback errors on my Google account?
- How can clearing history fix YouTube video playback issues?
If you’re experiencing issues with YouTube videos not playing when logged in with a specific Google account, even after trying different PCs, here’s a step-by-step guide to resolve the problem.
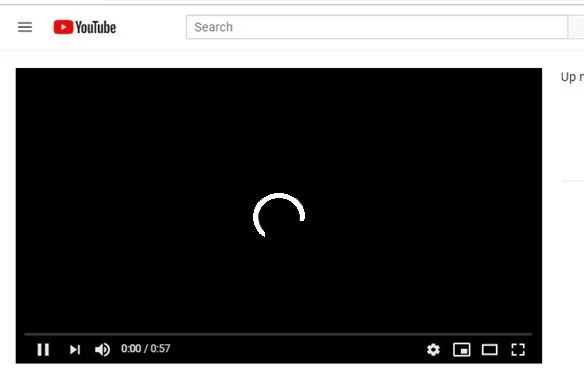
The Problem:
YouTube videos are not loading or playing when you are logged into a particular Google account. This issue persists across multiple devices and browsers, suggesting that the problem is related to the account itself rather than the hardware or browser.
The Solution:
Follow these steps to fix the issue:
- Clear Google Account-Level History:
- Go to myactivity.google.com and sign in with the affected Google account.
- On the left sidebar, select “Delete activity by”.
- Choose “All time” to delete your activity data, which includes search history, watched videos, and other account-level data.
- Clear Chrome Browsing History:
- Open Google Chrome and click on the three dots in the top-right corner.
- Go to History > History or press Ctrl + H.
- Click on Clear browsing data.
- In the dialog box, select “All time” as the time range.
- Check all the options (Browsing history, Cookies and other site data, Cached images and files) and click Clear data.
- Check the System Date and Time:
- Ensure that the date and time on your computer are set correctly.
- Incorrect date and time settings can cause issues with accessing websites like YouTube.
- Restart Chrome:
- Close and reopen Chrome to apply the changes.
- Log back into the problematic Google account and try playing a YouTube video again.
By following these steps, you should be able to resolve the issue and get YouTube videos playing smoothly again with the specific Google account.
Additional Tips:
- Ensure that your Chrome browser is up to date by checking for updates under Settings > About Chrome.
- If the problem persists, try disabling any browser extensions that might be interfering with YouTube playback.
This guide should help you fix the issue of YouTube videos not playing with a specific Google account. If you encounter any other problems or need further assistance, feel free to leave a comment or contact support.
Here are some additional tips to help solve the issue of YouTube videos not playing with a specific Google account:
1. Update Google Chrome:
- Make sure your Chrome browser is up to date. An outdated browser can cause compatibility issues with YouTube. Go to Settings > About Chrome to check for updates.
2. Disable Extensions:
- Sometimes browser extensions can interfere with YouTube playback. Try disabling all extensions and see if the problem persists. You can do this by going to chrome://extensions/ and toggling off the extensions.
3. Check for Conflicting Software:
- Some third-party software or antivirus programs may conflict with YouTube. Temporarily disable them to see if they are causing the issue.
4. Clear YouTube App Cache (for mobile users):
- If you’re also experiencing this issue on mobile, clear the YouTube app cache. Go to Settings > Apps > YouTube > Storage and select Clear Cache.
5. Reset Chrome Settings:
- If the issue persists, try resetting Chrome settings to their default. Go to Settings > Advanced > Reset and clean up > Restore settings to their original defaults.
6. Log Out and Log Back In:
- Try logging out of your Google account on all devices and then log back in. This can sometimes refresh account settings and resolve the issue.
7. Try Incognito Mode:
- Open Chrome in Incognito Mode (Ctrl+Shift+N) and log in to your Google account. This disables extensions and uses default settings, helping to identify the cause.
8. Test with Another Browser:
- Try accessing YouTube from a different browser (e.g., Firefox, Edge). If it works, the issue might be specific to Chrome.
9. Check YouTube Server Status:
- Sometimes the issue might be on YouTube’s end. Check the status of YouTube servers on websites like DownDetector to see if there are any ongoing outages.
10. Clear DNS Cache:
- On your PC, open Command Prompt and type
ipconfig /flushdnsto clear the DNS cache. This can resolve any network-related issues that might be affecting YouTube.
These additional tips should provide further troubleshooting steps to help resolve the issue of YouTube videos not playing with a specific Google account.

How to Optimize Short Clip Rendering in Adobe Premiere Pro: Avoiding Long Audio Preview Times
How to Optimize Short Clip Rendering in Adobe Premiere Pro: Avoiding Long Audio Preview Times
- How to Avoid Long Audio Preview Times When Rendering in Adobe Premiere Pro
- Quick Fix: Prevent Adobe Premiere Pro from Repeatedly Rendering Audio Previews
- Speed Up Short Clip Rendering in Premiere Pro by Skipping Unnecessary Audio Previews
- Optimize Adobe Premiere Pro Rendering: Stop Unnecessary Audio Previews
- Simplify Rendering in Adobe Premiere: Bypass Excessive Audio Preview Generation
These titles are more likely to attract users searching for solutions to issues with rendering and audio previews in Adobe Premiere Pro. Let me know if any of these resonate with you, or if you’d like more options!
If you’ve encountered issues with lengthy audio preview times while rendering short clips from a long program video in Adobe Premiere Pro, especially when using Media Encoder, you’re not alone. This guide will explain the problem and provide a straightforward solution to optimize your workflow and save time.
The Problem:
When rendering short clips from a long video (e.g., 1-hour video) using Media Encoder, you may notice that the rendering process takes an excessive amount of time due to the generation of multiple audio previews. For instance, if your project involves 150 audio previews, it can significantly slow down the rendering process for each clip, even if you’re only rendering a 5-minute segment.
The Solution:
To avoid the issue of extended audio preview times, it’s recommended to render your video clips directly within Adobe Premiere Pro instead of using Media Encoder. Here’s how you can do it:
Step-by-Step Guide:
- Set In and Out Points for the Short Clip:
- Open your project in Adobe Premiere Pro.
- Navigate to the timeline and set the In and Out points around the specific clip you want to render by pressing I (In) and O (Out) on your keyboard.
- Open the Export Settings:
- Go to File > Export > Media or press Ctrl + M to open the Export Settings window.
- Choose Your Export Settings:
- Select the desired format and preset for your video export.
- Adjust the settings as needed for resolution, bitrate, and other parameters.
- Render the Clip:
- Instead of sending the clip to Media Encoder, click on Export directly in Adobe Premiere Pro.
- The rendering process will begin, and you’ll notice that Adobe Premiere Pro generates the audio previews only once, during the first video render. Subsequent renders will skip the audio preview generation, making the process faster.
- Repeat for Additional Clips:
- If you have more clips to render from the same project, repeat the process. Each subsequent render will be faster since Premiere Pro has already generated the necessary audio previews.
Why This Solution Works:
By rendering directly in Adobe Premiere Pro, you avoid the repeated generation of audio previews that occurs when using Media Encoder. Premiere Pro efficiently handles audio previews by generating them only once, thereby reducing the rendering time for each subsequent clip.
Additional Tips:
- Pre-render Audio: If you still need to use Media Encoder for batch processing, consider pre-rendering the audio in Premiere Pro by going to Sequence > Render Audio. This will ensure that audio previews are generated in advance, reducing rendering time in Media Encoder.
- Save Presets: Save your preferred export settings as a preset to streamline the rendering process for future projects.
By following this approach, you can efficiently render short clips from long videos without being bogged down by lengthy audio preview times, ensuring a smoother and faster workflow.
This method is particularly useful for projects involving large amounts of raw footage and multiple short clip renders. Implementing this solution will save you time and improve your overall productivity in video editing.
Let me know if you need further assistance or additional tips for optimizing your Adobe Premiere Pro workflow!
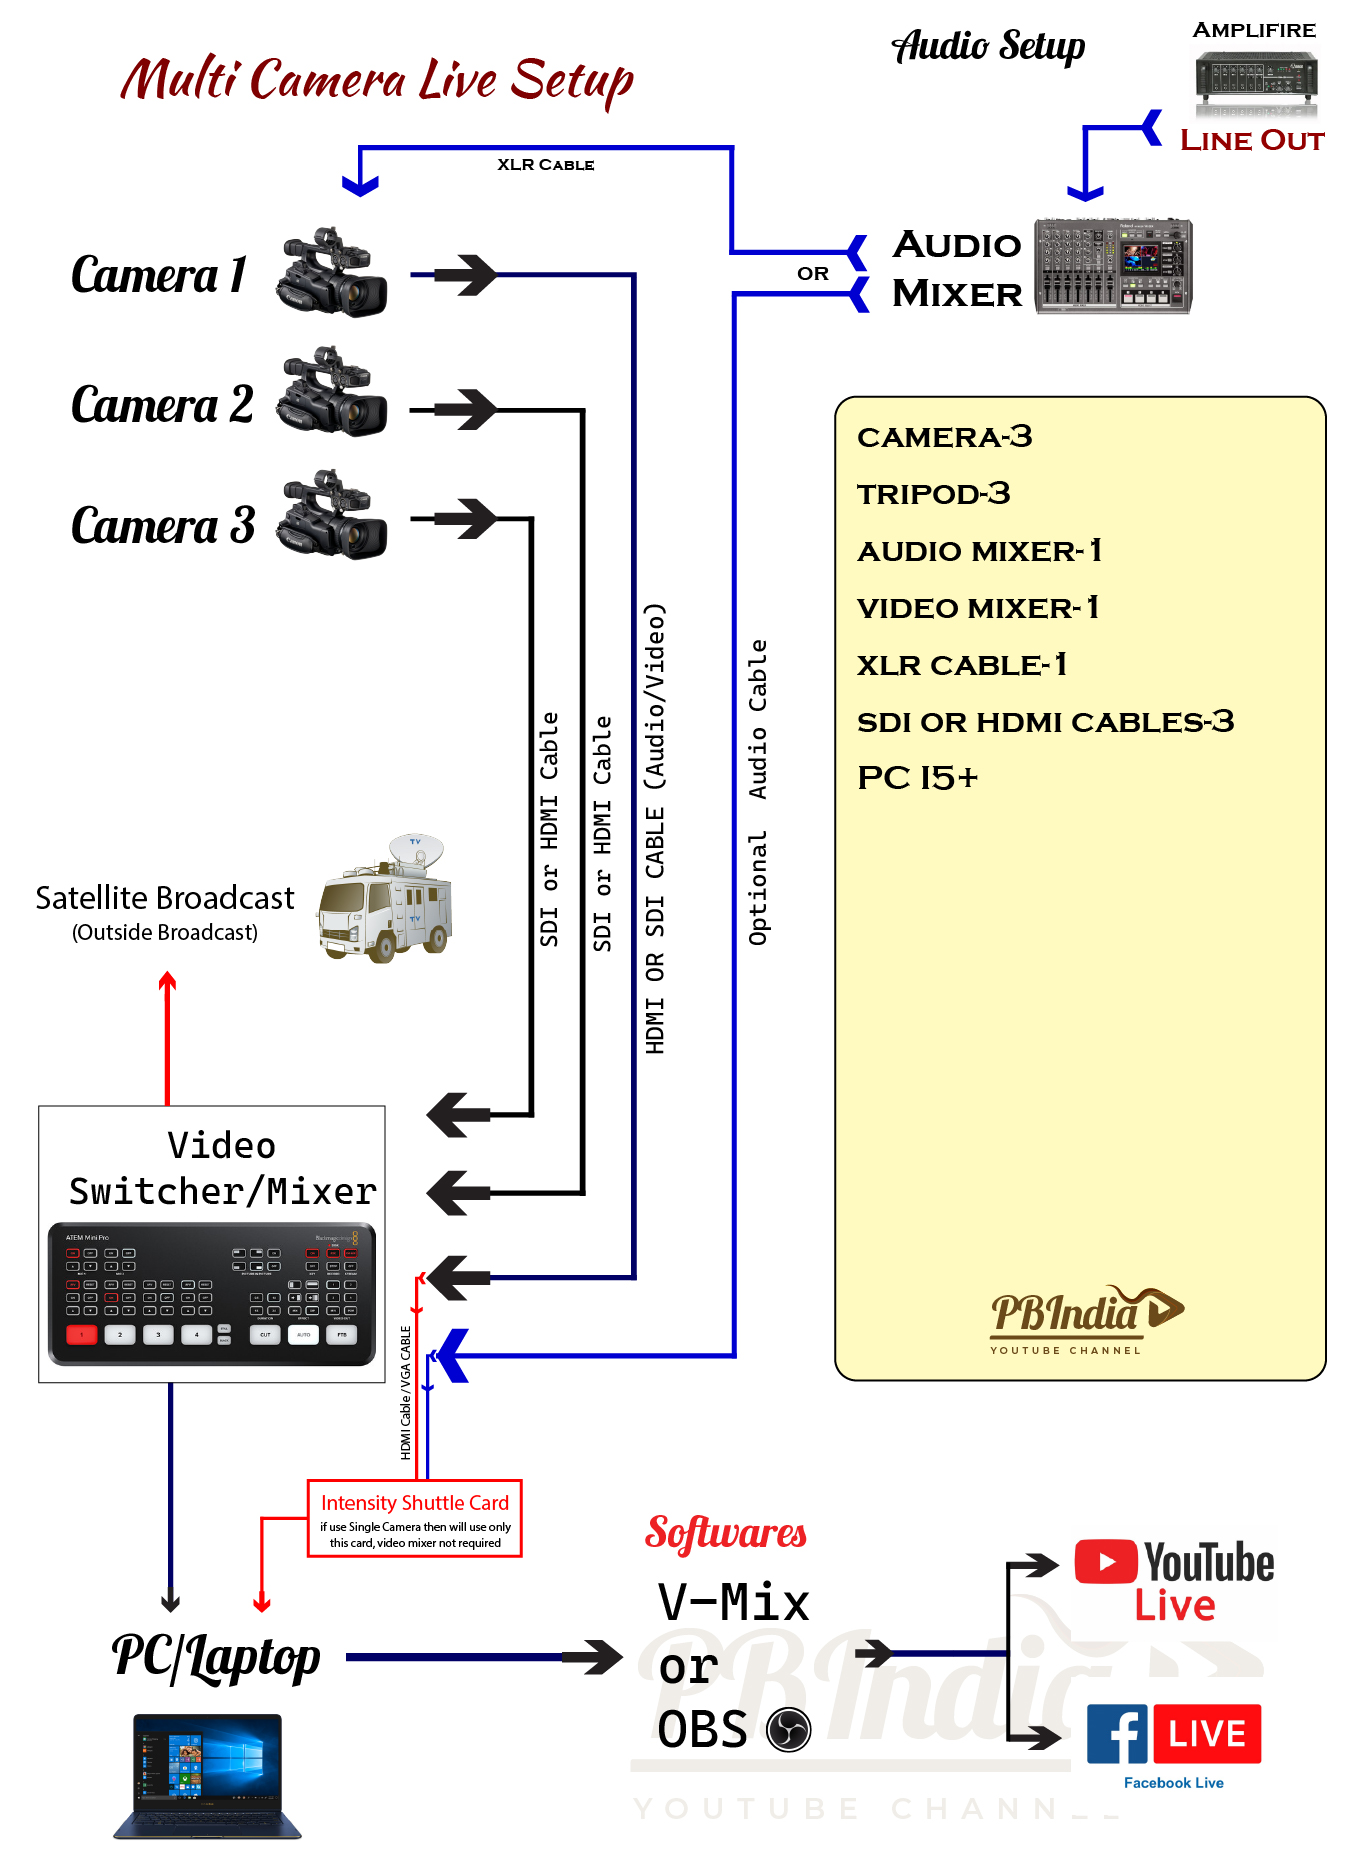
Multi-Camera Live Setup Tutorial
In this tutorial, we will walk you through the process of setting up a multi-camera live streaming system, as illustrated in the diagram. This setup is ideal for live events, religious ceremonies, conferences, and other activities where a professional, multi-angle video presentation is required.
Required Equipment:
- Cameras (3): High-quality cameras for capturing the event from multiple angles.
- Tripods (3): For stable camera placement.
- Audio Mixer (1): To manage and mix the audio inputs from different sources.
- Video Switcher/Mixer (1): To switch between camera feeds during the live stream.
- XLR Cable (1): For connecting the audio mixer to the amplifier.
- SDI or HDMI Cables (3): For connecting the cameras to the video mixer.
- PC (i5+ or higher): For running live streaming software.
Setup Instructions:
- Camera Setup:
- Position your three cameras strategically around the venue to capture different angles of the event.
- Mount each camera on a tripod for stability.
- Connect each camera to the Video Switcher/Mixer using either an SDI or HDMI cable.
- Audio Setup:
- Connect your audio sources (e.g., microphones) to the Audio Mixer.
- Use an XLR or other Audio cable to connect the Audio Mixer to the Amplifier.
- Take a Line Out from the Amplifier and feed it back into the Audio Mixer for the best sound quality.
- Connecting to the Video Switcher/Mixer:
- Connect the Audio Mixer to the Video Switcher/Mixer using an XLR or other Audio Cable.
- Make sure that all camera feeds are properly connected to the Video Switcher/Mixer.
- If using a single camera, you can connect directly to the Intensity Shuttle Card, bypassing the Video Switcher/Mixer.
- PC and Software Setup:
- Connect the Video Switcher/Mixer to your PC or Laptop using the appropriate cable.
- Install and configure live streaming software like V-Mix or OBS on your PC.
- Make sure to configure the software to receive video and audio feeds from your Video Switcher/Mixer.
- Broadcasting Live:
- Once everything is set up and configured, you can begin broadcasting live to platforms like YouTube Live or Facebook Live directly from your PC.
- Use your live streaming software to switch between camera angles and manage audio levels during the broadcast.
Tips for a Successful Live Stream:
- Stable Internet Connection: Ensure you have a reliable and high-speed internet connection to avoid buffering or interruptions during the live stream.
- Test Before Going Live: Always perform a test run of the setup before the actual event to troubleshoot any potential issues.
- Backup Plan: Have a backup camera or microphone ready in case of equipment failure.
- Quality Control: Monitor the live stream on a separate device to ensure the audio and video quality are consistent throughout the broadcast.
This setup is designed to provide a professional live streaming experience with multiple camera angles, clear audio, and seamless transitions. By following these steps, you can create engaging and high-quality live streams for your audience.
How to Download Large Files from Google Drive Without Any Issues
How to Download Large Files from Google Drive Without Any Issues
Downloading large files from Google Drive can sometimes be tricky, but by following these steps, you can ensure a smooth download process on Windows 7, 8, 10, and 11.
Step-by-Step Guide:
- Install Google Drive on Your PC:
- Download and install the Google Drive application on your PC.
- During the installation process, you will be prompted to log in with your Google account. Follow the instructions to log in.
- Create a Folder for Downloads:
- Once installed, Google Drive will create a folder on your PC. This folder is typically located in “This PC” or “My Computer”.
- Open this folder and create a new folder named “Large Data Download”.
- Add a Shortcut to the Download Folder:
- Open your web browser and log in to your Google account (the same account you used for Google Drive).
- Go to the link containing the large data file shared by your friend or another source.
- Click on the arrow next to the folder name (this is the folder containing the large data file).
- Select “Add Shortcut to Drive”.
- Navigate to “My Drive” and locate the “Large Data Download” folder you created.
- Select the “Large Data Download” folder and click “Add”.
- Make the Folder Available Offline:
- Go to the “Large Data Download” folder on your PC (This PC > Google Drive > Large Data Download).
- Right-click on the folder.
- On Windows 10 and 11, click on “Show more options” if needed, then select “Offline access” and choose “Available offline”.
- On Windows 7 and 8, you may need to look for similar options in the context menu.
Now, the large file will start syncing to your “Large Data Download” folder and will be available for offline access.
Tips:
- Ensure you have enough storage space on your PC to accommodate the large file.
- A stable internet connection will help speed up the download process.
By following these steps, you can download large files from Google Drive without any issues, ensuring they are available offline for your convenience.
How to Install Flutter on Windows 10 or 11
Step 01. Downaload Latest Android Studio by Google Search
Link : https://developer.android.com/studio
Then Intall ( You Can Install Any Specific Director based on Free Space, Becouse Android Studio Consuming to Much Space, in my case i have Installed in E/Android/Android Studio
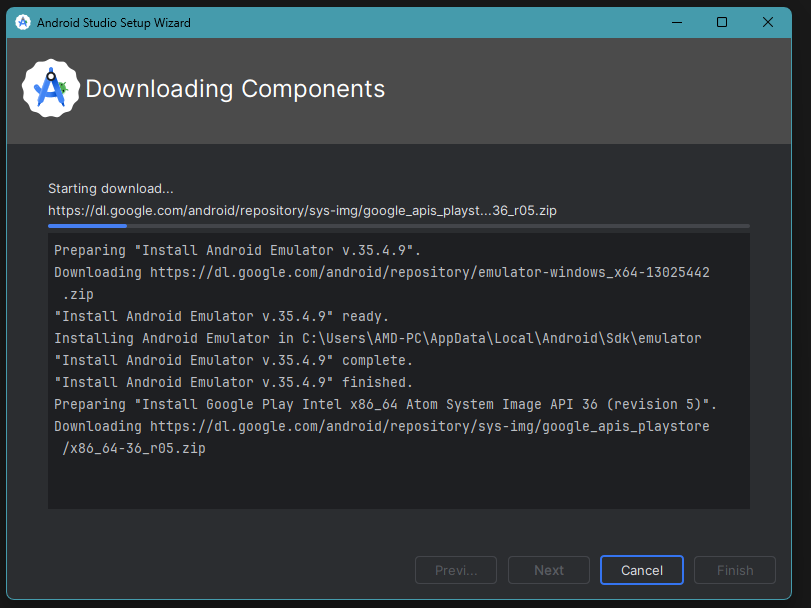
Also Install Nessesary File Prompt when install (Screetshot)
now downalod dart from here for windows https://dart.dev/get-dart/archive
download Stable Channel click Dart SDKDownaload in Zip, Then Extract D:\Android\Dart\

now setup path go to android studio settings> language and fra…>Dart
set DART SDK PAthD:\Android\Dart\dart-sdk
enable for ur project
————————————————————————
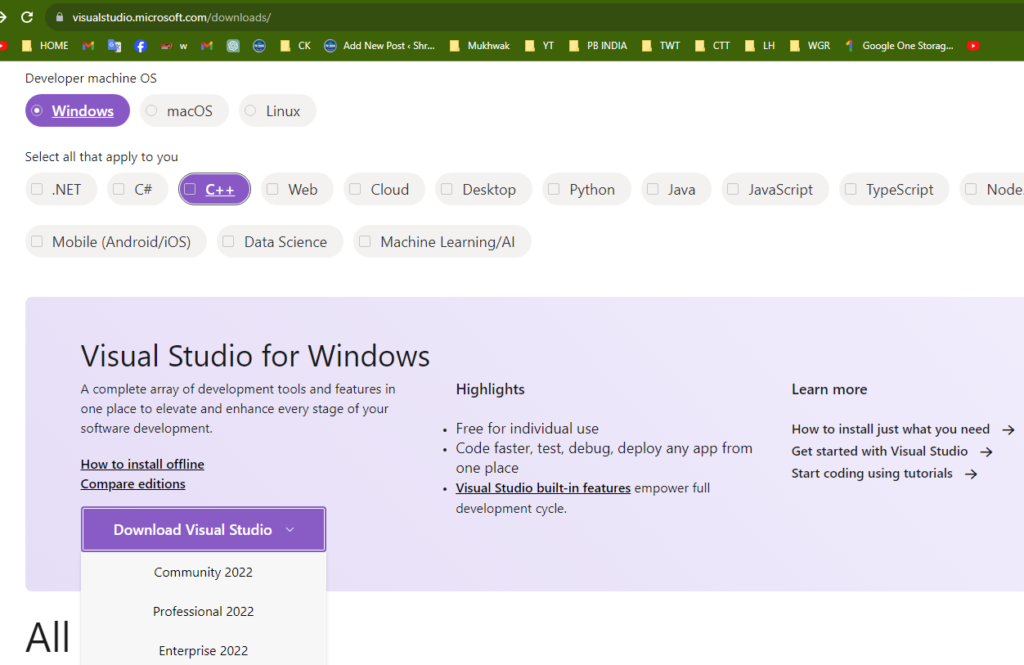
1. https://visualstudio.microsoft.com/downloads/ with c++ Cmmunity 2022 or Higher version (default instaltion) see in image
2. Download Git From Here https://git-scm.com/download/win
3. Download Flutter install or Extract in C:\dev\flutter you can also make src folder or dev. (here i created dev folder in c drive)
4. Download and install Android Studio C:\dev\AndroidStudio and Open Go to SDK Manager>SDK Tool Select Android SDK Command-line Tools (latest)
if
[X] Android toolchain – develop for Android devices
X Unable to locate Android SDK.
cmd:- if android studio intalled on C:\dev\SDK
flutter config --android-sdk C:\dev\SDK

restart cmd instant then run flutter doctor
flutter doctor --android-licenses
enter y.y.y..y..y.y.y,,,,,,,,,,,,,,,,
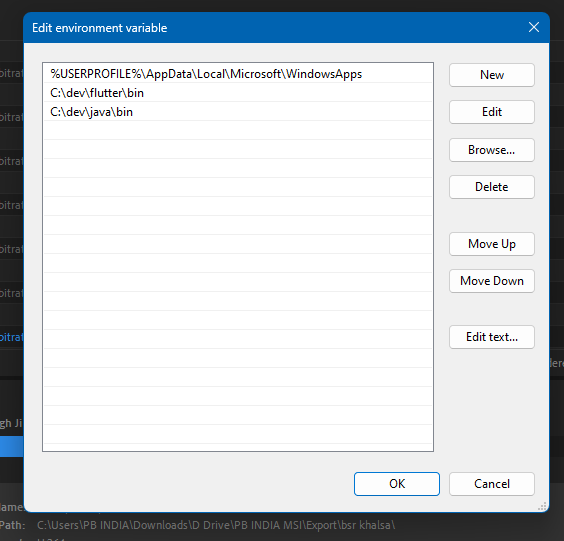
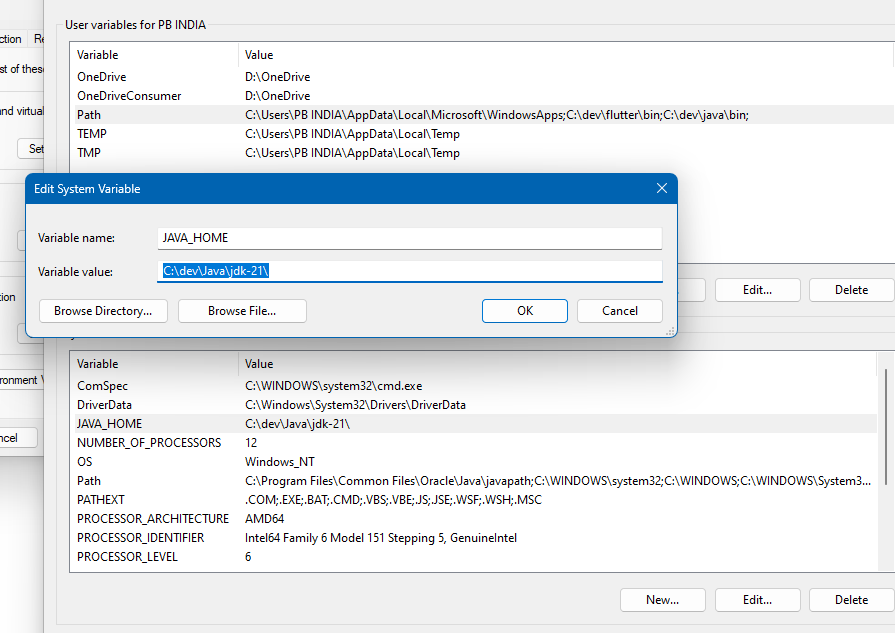
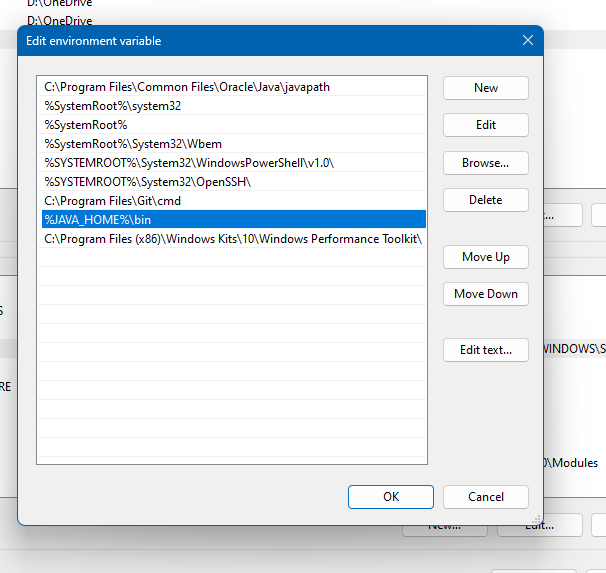
only blue add manual in system envir….
%JAVA_HOME%\bin