
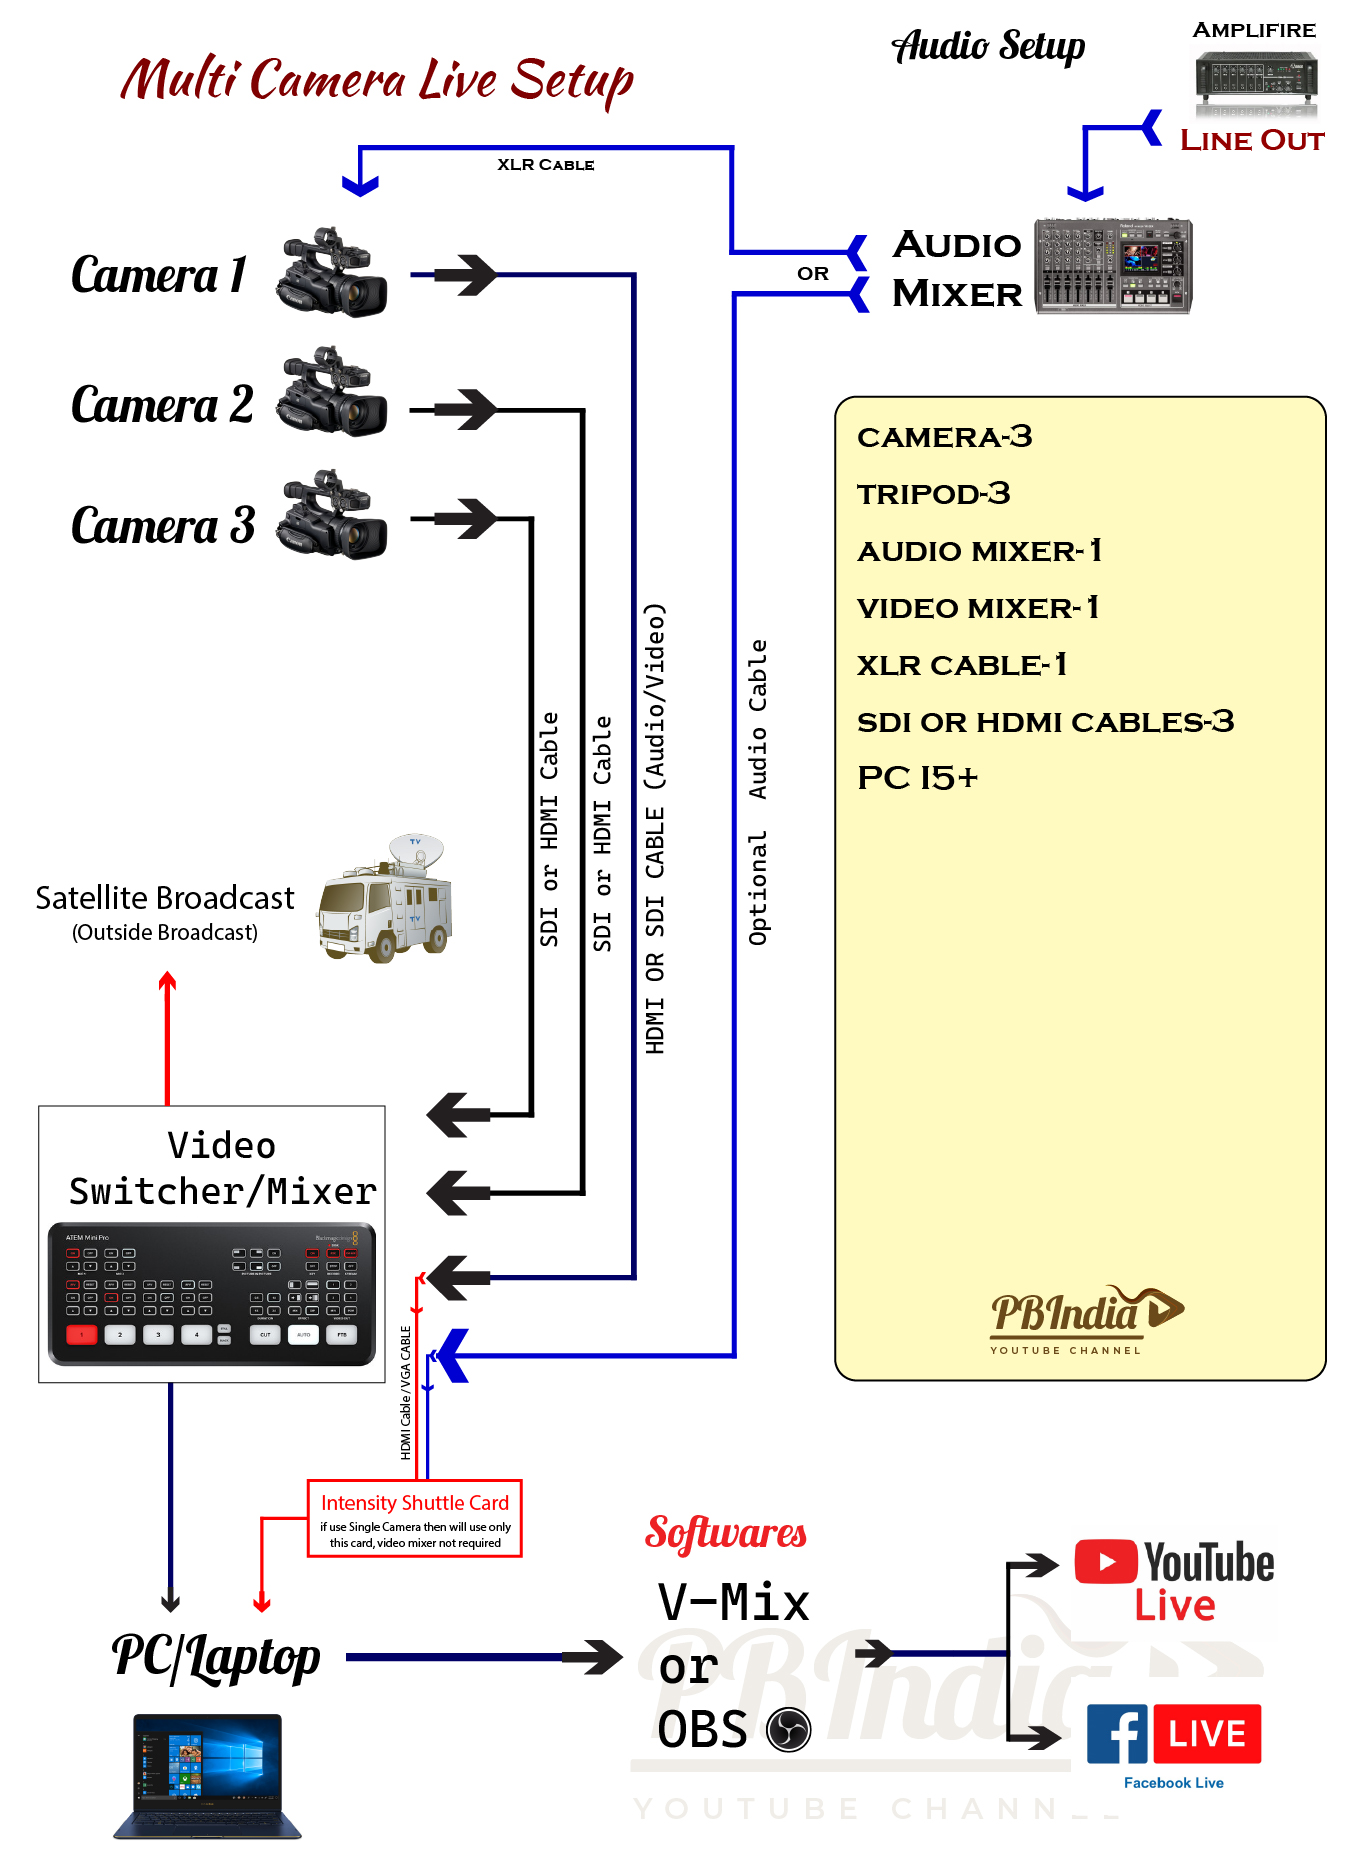
In this tutorial, we will walk you through the process of setting up a multi-camera live streaming system, as illustrated in the diagram. This setup is ideal for live events, religious ceremonies, conferences, and other activities where a professional, multi-angle video presentation is required.
Required Equipment:
- Cameras (3): High-quality cameras for capturing the event from multiple angles.
- Tripods (3): For stable camera placement.
- Audio Mixer (1): To manage and mix the audio inputs from different sources.
- Video Switcher/Mixer (1): To switch between camera feeds during the live stream.
- XLR Cable (1): For connecting the audio mixer to the amplifier.
- SDI or HDMI Cables (3): For connecting the cameras to the video mixer.
- PC (i5+ or higher): For running live streaming software.
Setup Instructions:
- Camera Setup:
- Position your three cameras strategically around the venue to capture different angles of the event.
- Mount each camera on a tripod for stability.
- Connect each camera to the Video Switcher/Mixer using either an SDI or HDMI cable.
- Audio Setup:
- Connect your audio sources (e.g., microphones) to the Audio Mixer.
- Use an XLR or other Audio cable to connect the Audio Mixer to the Amplifier.
- Take a Line Out from the Amplifier and feed it back into the Audio Mixer for the best sound quality.
- Connecting to the Video Switcher/Mixer:
- Connect the Audio Mixer to the Video Switcher/Mixer using an XLR or other Audio Cable.
- Make sure that all camera feeds are properly connected to the Video Switcher/Mixer.
- If using a single camera, you can connect directly to the Intensity Shuttle Card, bypassing the Video Switcher/Mixer.
- PC and Software Setup:
- Connect the Video Switcher/Mixer to your PC or Laptop using the appropriate cable.
- Install and configure live streaming software like V-Mix or OBS on your PC.
- Make sure to configure the software to receive video and audio feeds from your Video Switcher/Mixer.
- Broadcasting Live:
- Once everything is set up and configured, you can begin broadcasting live to platforms like YouTube Live or Facebook Live directly from your PC.
- Use your live streaming software to switch between camera angles and manage audio levels during the broadcast.
Tips for a Successful Live Stream:
- Stable Internet Connection: Ensure you have a reliable and high-speed internet connection to avoid buffering or interruptions during the live stream.
- Test Before Going Live: Always perform a test run of the setup before the actual event to troubleshoot any potential issues.
- Backup Plan: Have a backup camera or microphone ready in case of equipment failure.
- Quality Control: Monitor the live stream on a separate device to ensure the audio and video quality are consistent throughout the broadcast.
This setup is designed to provide a professional live streaming experience with multiple camera angles, clear audio, and seamless transitions. By following these steps, you can create engaging and high-quality live streams for your audience.