
Live Youtube Stream with OBS Studio on low Configration PC
Problem
OBS Studio Streaming Good Speed in Green Sign but Youtube Displaying Stream Not Smooth, Input Video Source : Intensity Shuttle Card USB 3.0. , Software and Drivers Latest From “Desktop Video Setup V. 12.4”, OBS Studio Latest (V. 27…)
Dowload OBS Studio 23.1.0

How to Share Folders PC-to-PC without Wires
Sharing folders between PCs without a wired connection can be convenient for quick file transfers. Here’s a step-by-step guide to setting up wireless file sharing between two PCs.
- Easy Guide: Sharing Folders Between PCs Wirelessly
- How to Share Files Between Computers Without Cables
- Wireless File Sharing: Connect PC-to-PC Without Wires
- Step-by-Step: Share Folders Over Wi-Fi Without a Network Cable
- No Cables Needed! How to Share Folders Between Windows PCs Wirelessly
- File Sharing Made Easy: Connect PCs Without Wires
- How to Set Up Wireless Folder Sharing Between Two PCs
- Share Files Between Computers Without Ethernet Cables
- Wireless Folder Sharing Between PCs: A Beginner’s Guide
- Connecting PCs for File Sharing Without Wires or USB Drives
- How to Access Shared Folders on Another PC
- Step-by-Step: Access Files on Another Computer Over Wi-Fi
- Connect to Another PC’s Shared Folder Without Cables
- How to View and Access Files on a Networked Computer
- Easy Guide to Accessing Folders on Another Windows PC
- Access Files on Another Computer Over the Network
- How to Open Shared Folders on a Different PC
- Accessing Another PC’s Shared Files Over Wi-Fi
- How to Connect and Access Shared Folders on a Network
- Remote Access: How to Open Folders on Another Computer
Step 1: Enable Function Discovery Provider
- Open Services by searching in the Windows Start Menu.
- Find Function Discovery Provider Host, double-click on it, and set the startup type to Automatic (Delayed Start).
- Click Stop > Apply > Start > OK to apply the changes.
Step 2: Enable SMB 1.0/CIFS File Sharing
- Search for Turn Windows features on or off in the Windows Start Menu.
- Locate SMB 1.0/CIFS File Sharing Support, expand it, and check all the boxes.
- Click OK and wait for the installation to complete.
Step 3: Configure Advanced Sharing Settings
- Go to Control Panel > Network and Sharing Center > Advanced sharing settings.
- Under Private:
- Turn on network discovery.
- Turn on file and printer sharing.
- Turn off password-protected sharing (if you want access without a password).
- Click Save changes.
Step 4: Set Network Profile to Private
- Click on the connected network (Wi-Fi or Ethernet).
- Go to Network profile and set it to Private.
- Go to Control Panel > Windows Defender Firewall > Allowed apps:
- Make sure File and Printer Sharing and Network Discovery are allowed for the Private profile.
Step 5: Configure Folder Permissions
- Right-click on the folder you want to share, select Properties > Sharing > Advanced Sharing.
- Check Share this folder, then click Permissions.
- Add the user Everyone or the specific PC name to allow access.
- For folders on C drive, go to the Security tab, add the user, and give Full Control permissions.
Step 6: Enable Guest Access (If Prompted for a Password)
- Press Win + R, type
gpedit.msc, and press Enter to open the Group Policy Editor. - Navigate to Computer Configuration > Administrative Templates > Network > Lanman Workstation.
- Double-click on Enable insecure guest logons, set it to Enabled, and click OK.
Restart both PCs and try accessing the shared folder again. If you still see a password prompt, ensure all settings are applied as described.
⚠️ Warning
If your computer is on a large network, such as in a department or organization where multiple computers are connected to the same network, do not set folder permissions to “Everyone.” This could expose your files to anyone on the network.
However, if you’re on a Home, Small office, or a network where only trusted individuals have access, it’s generally safe to set permissions to “Everyone” for easier sharing.
Always ensure that you are aware of who has access to the network to keep your data secure.
🔧 Additional Note (Error Fix)
Sometimes you may see this error when trying to access a shared folder:
\\PC-NAME is not accessible.
Account restrictions are preventing this user from signing in.
For example: blank passwords aren't allowed...
👉 Solution:
- Set a password for the user account on the PC that is sharing the folder OR
- Go to Control Panel > Network and Sharing Center > Advanced sharing settings and enable Turn off password protected sharing.
After applying this, the error will be resolved and the shared folder will be accessible from other PCs. ✅
❓ What if the error still appears even after disabling password protected sharing?
If you still get the same error, you may need to adjust a local security policy:
- Press Win + R, type
gpedit.msc, and press Enter. - Navigate to:
Computer Configuration > Windows Settings > Security Settings > Local Policies > Security Options - Find: Accounts: Limit local account use of blank passwords to console logon only
- Set this policy to Disabled.
This allows folder sharing to work even if the account has no password, but for security reasons using a password is always recommended. 🔒
How to Resume Rendering, When Program, Not Responding ?
Here is tutorial only for Adobe Premiere Pro And After Effect Windos 10.
- Go To Task Manager
- Select Running App Adobe Premiere Pro and Expand it
- End the Task or Stop Running only Intaaled other apps In PC
- If Your Are Using Project of Adobe After Effect Inside Adobe Premiere Pro Then Stop running Adobe After Effects
- Go to Your Project Files Adobe Premiere Pro And Adobe After Effects Project File
- Open Both File for Reffresh the Rendering
If Not working Then Commenting Please.
AfterFX.exe System Error?
1 – Right Click the Windows Logo
2 – Choose Apps and Features
3 – Click “Optional Features”
4 – Press the “+” sign where it says “Add a feature”
5 – Search for “Media Feature Pack”
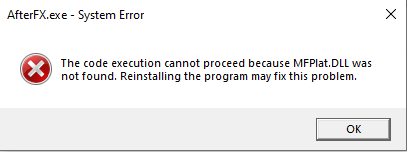
Note : If Not Working Then Update Windows.
what is “esc_html”, “esc_html ()”, “esc_html__” and “esc_html__()” in wordpress or PHP ?
“esc_html”
Filters a string cleaned and escaped for output in HTML. Text passed to esc_html() is stripped of invalid or special characters before output.
esc_html ()
Escaping for HTML blocks.
esc_html__
Retrieve the translation of $text and escapes it for safe use in HTML output. If there is no translation, or the text domain isn’t loaded, the original text is escaped and returned.
esc_html__()
Retrieve the translation of $text and escapes it for safe use in HTML output. If there is no translation, or the text domain isn’t loaded, the original text is escaped and returned.
What is “wp-kses_post” in wordpress?
wp-kses_post will sanetize to post-content for allowed HTML Tags, for posting content